sphinx 使用指南
前言
Sphinx介绍
Sphinx是一种文档生成工具,主要用于生成和管理过程文档。它支持以Python为基础的丰富插件,可以输出为HTML,PDF,Latex等格式。
reStructuredText 介绍
reStructuredText (简称reST)是一种轻量级标记语言,文件名后缀为.rst。是 Sphinx 使用的默认纯文本标记语言
markdown介绍
Markdown 也是一种轻量级标记语言,文件名后缀通常为.md。
环境准备
Python安装
Linux环境
- 确保已安装Python
1 | python3 --version |
- 如果未安装,使用包管理器安装:
- Ubuntu/Debian系统:
1 | sudo apt install python3 python3-pip |
- Red Hat/CentOS系统:
1 | sudo yum install python3 python3-pip |
Windows环境
- 访问Python官网:https://www.python.org,下载最新版本安装包。
- 在安装时,确保选中“Add Python to PATH”选项。
- 确认Python安装正常:
1 | python --version |
Sphinx安装
安装Sphinx本体
直接使用pip安装即可
1 | pip install sphinx |
*相关扩展
这一部分不是不是现在必须安装,介绍到相关内容我们会详细解释。
Sphinx主题
Sphinx可以自己选择编译输出的主题,常见主题可直接使用pip安装,然后在conf.py文件中配置。
例如,安装Press主题:
1 | pip install sphinx-press-theme |
- 可以在这个网站中寻找合适的主题:Sphinx Themes Gallery
Markdown支持
Sphinx默认使用的是reST语言,想要支持Markdown则需要安装相应的解释器插件。
我们参考官方文档使用pip安装myst-parser,之后再conf.py文件中配置。当然也可以根据需求安装其他的解释器。
1 | pip install --upgrade myst-parser |
快速开始
创建工作目录
- 创建一个用于存放文档的工作目录,例如:
1 | mkdir my_sphinx_docs |
建立工程
- 使用Sphinx提供的命令初始化一个新工程:
1 | sphinx-quickstart |
- 根据提示输入项目信息,例如项目名称、作者、语言等。各个信息的解释放在了下面的注释中:
1 | Sphinx-quickstart |
工程结构介绍
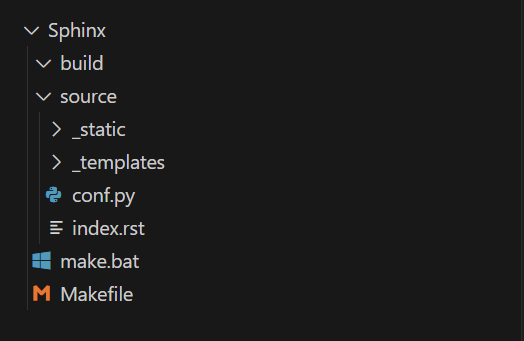
如果选的是源码与生成文件分开存放,则总的工程结构如下图,随后我们将逐个介绍。
build文件夹
build文件夹存放的是Sphinx生成的最终文档。它是一个输出目录,其中包含了生成的HTML、PDF或其他格式的文档文件。当执行构建命令(比如make html)时,Sphinx会将编译结果放在该目录下。这个文件夹的内容会随着每次构建而更新,因此也可以自由的删除这个目录重新进行构建。
我们在终端输入 make html,会发现build目录下多出了内容:
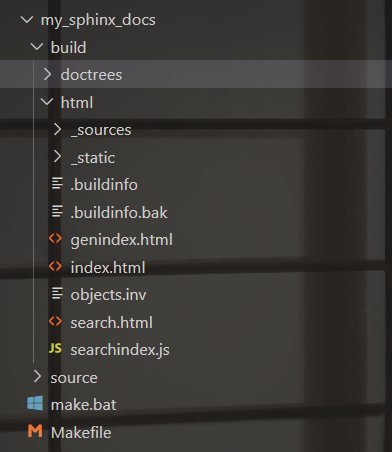
doctrees文件夹用于存储 Sphinx 构建过程中的中间数据,帮助加速后续的文档生成过程。
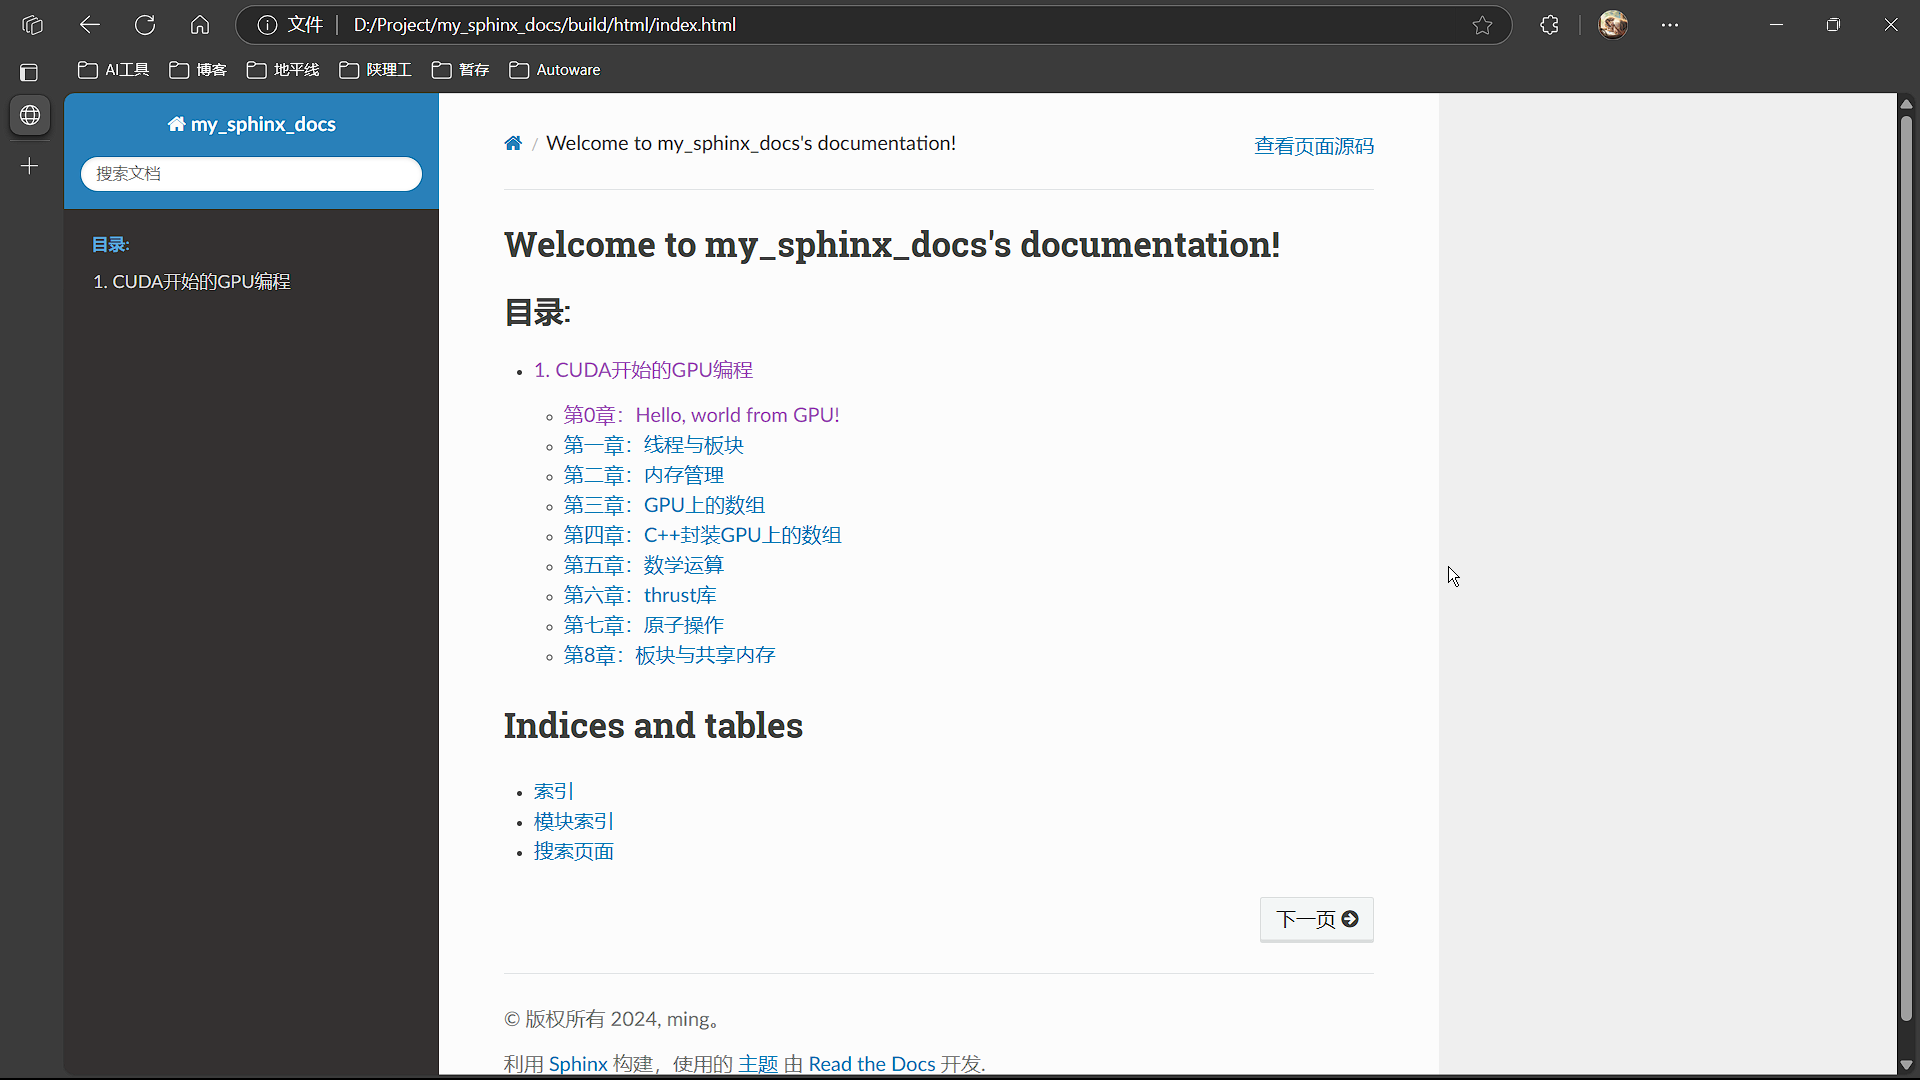
html文件夹就是最后输出的静态网页文件,我们可以打开index.html文件查看。也可以部署到web服务器上。
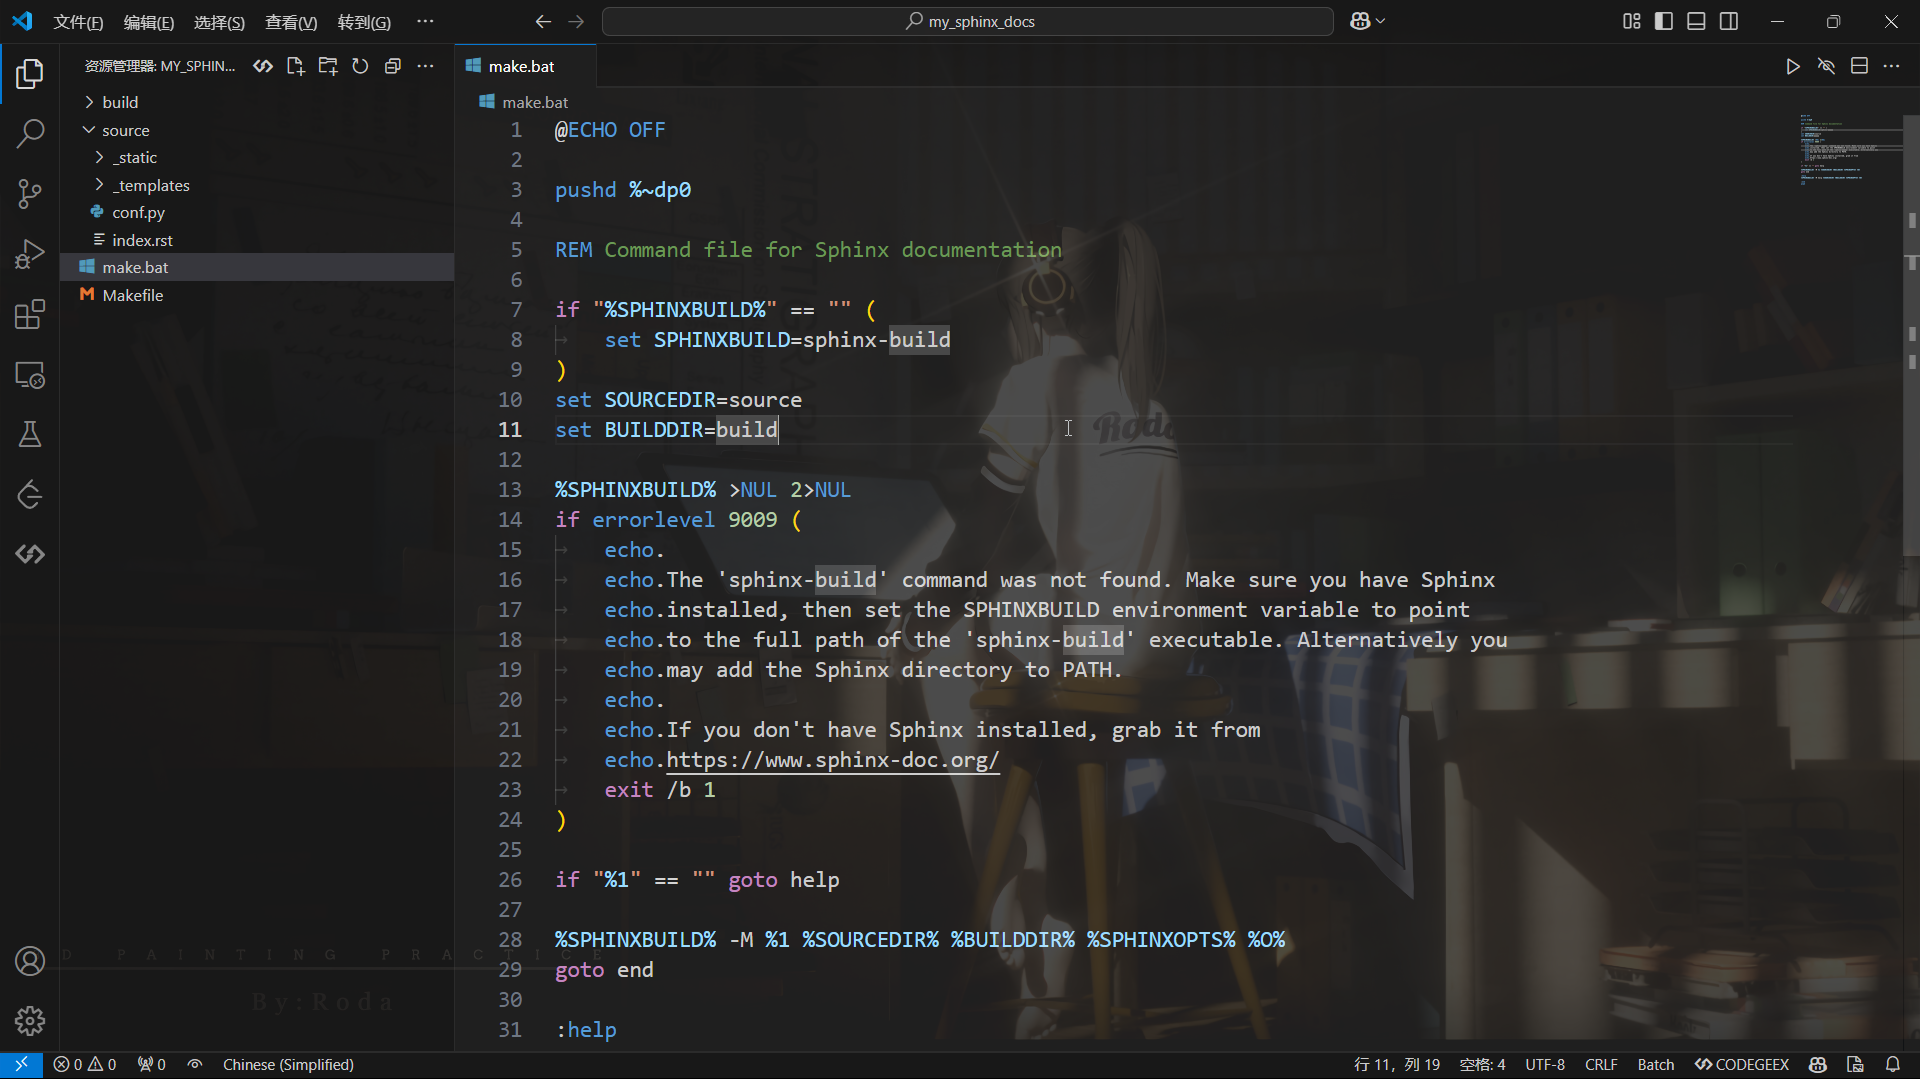
make.bat脚本 (Windows)
make.bat是Windows环境下用于构建文档的批处理脚本。我们可以在命令行中执行该脚本来自动构建Sphinx文档,类似于Linux/Mac系统中的Makefile。例如执行make.bat html,Sphinx会根据配置文件生成HTML格式的文档。
Makefile文件
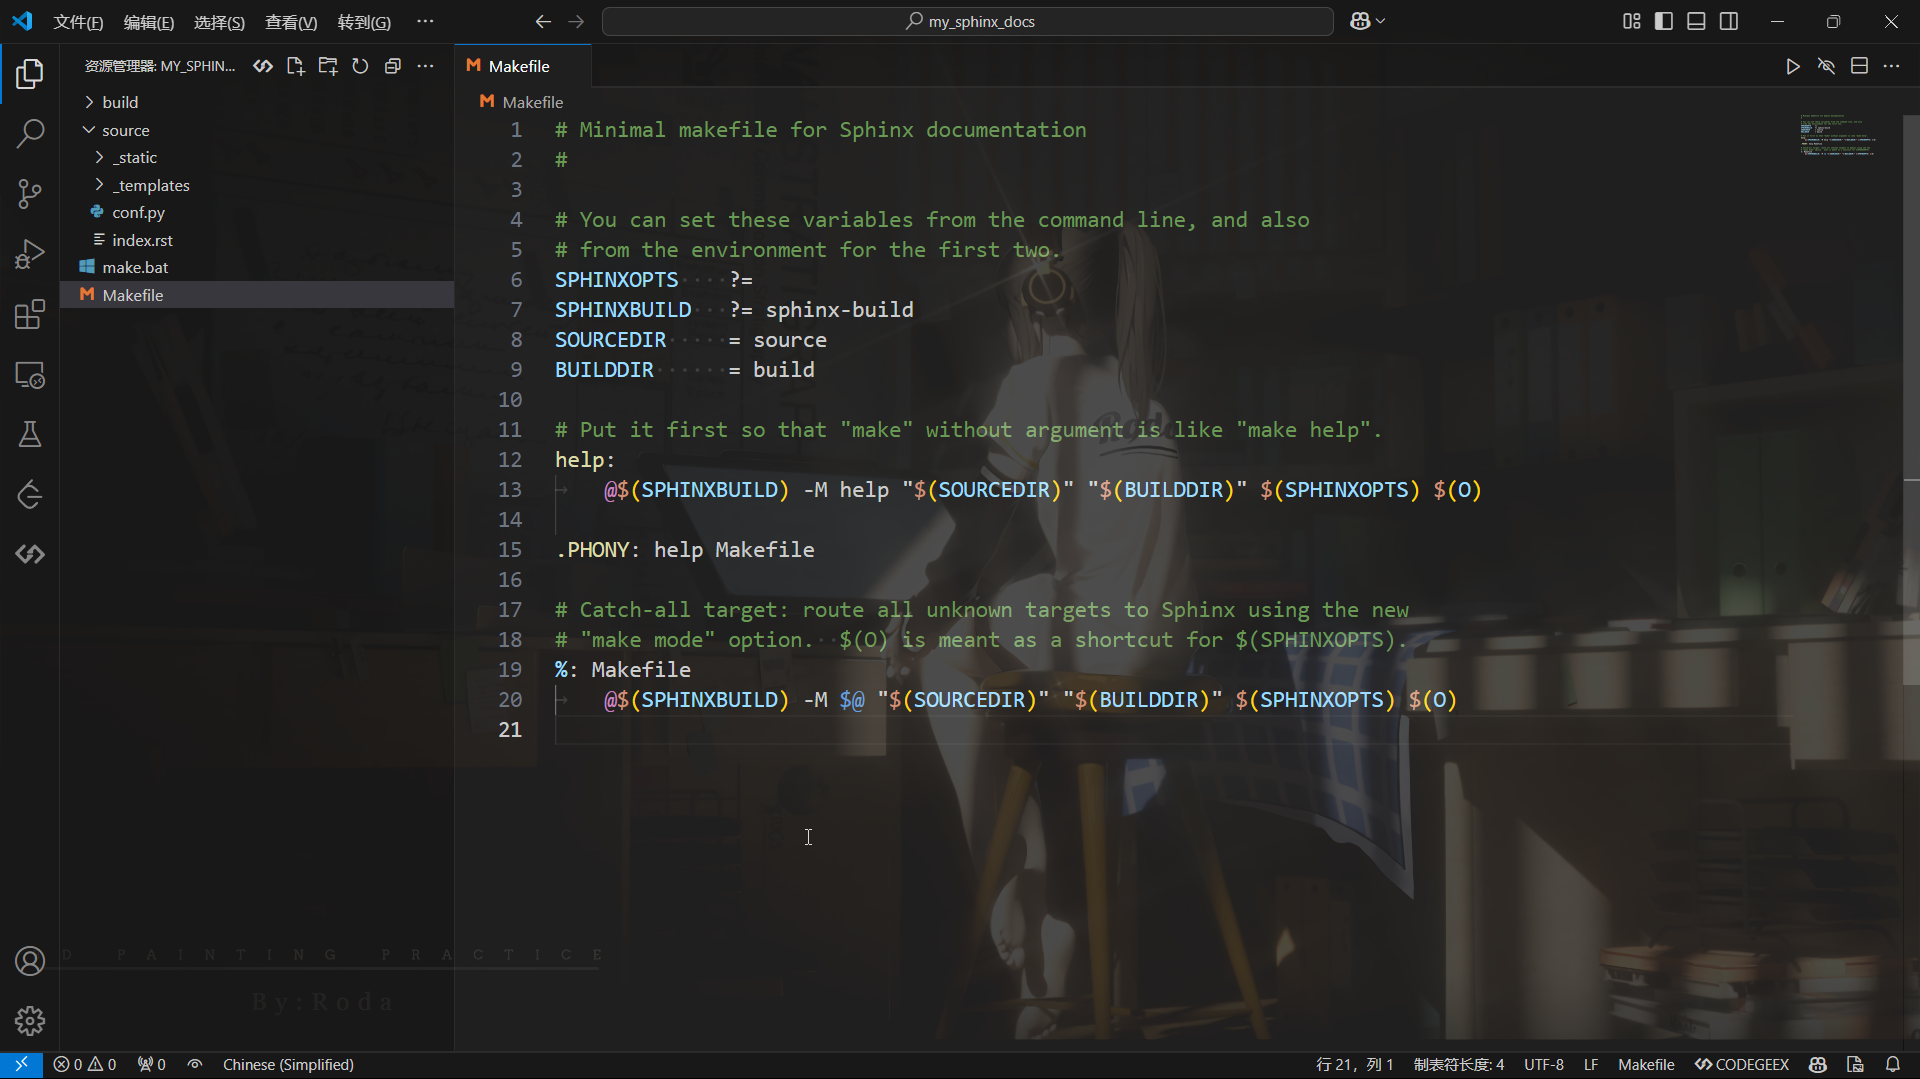
Makefile是Unix类系统(如Linux和macOS)下用来构建文档的文件。它定义了一系列的构建目标(如html、latex、pdf等),以及如何执行构建过程。我们可以通过命令行运行make命令来进行构建。例如,运行make html来生成HTML文档。另外也可以对这个文件进行修改,调整源路径、输出路径等。
source文件夹
source文件夹是存放文档源文件的地方,例如我们编辑的所有的.rst或.md文档文件。除了文档内容外,source文件夹里还包含一些辅助文件夹和配置文件:
_static文件夹用于存放静态资源,如图片、CSS文件、JavaScript文件等。这些资源在构建过程中会被自动引入并包含在最终的文档中。
_templayes文件夹用于存放自定义的HTML模板文件。如果需要修改文档的布局或外观,可以将自定义的HTML模板放在这个文件夹里,并在
conf.py中进行配置。conf.py配置文件(主要关注)这是Sphinx工程的主要配置文件。它定义了Sphinx构建过程中的所有重要设置,如文档的标题、作者、输出格式、扩展插件等。可以在这个文件中配置主题、插件以及其他生成选项。具 体解释可以阅读下面的注释内容:
1
2
3
4
5
6
7
8
9
10
11
12
13
14
15
16
17
18
19
20
21
22
23
24
25
26
27
28
29
30
31
32
33
34
35
36
37
38
39
40
41
42
43
44
45
46
47
48
49
50
51
52
53
54
55
56
57
58
59
60
61Configuration file for the Sphinx documentation builder.
# This file only contains a selection of the most common options. For a full
list see the documentation:
https://www.sphinx-doc.org/en/master/usage/configuration.html
-- Path setup --------------------------------------------------------------
If extensions (or modules to document with autodoc) are in another directory,
add these directories to sys.path here. If the directory is relative to the
documentation root, use os.path.abspath to make it absolute, like shown here.
# import os
import sys
sys.path.insert(0, os.path.abspath('.'))
-- Project information -----------------------------------------------------
project = 'my_sphinx_docs' # 项目名称
copyright = '2024, ming' # 版权信息
author = 'ming' # 作者
The full version, including alpha/beta/rc tags
release = '1.0' # 版本号
-- General configuration ---------------------------------------------------
Add any Sphinx extension module names here, as strings. They can be
extensions coming with Sphinx (named 'sphinx.ext.*') or your custom
ones.
extensions = [ # 添加扩展,其中sphinx.ext.*表示sphinx自带的扩展
'myst_parser', # markdown支持
'sphinx.ext.autodoc', # 自动生成文档插件
]
Add any paths that contain templates here, relative to this directory.
templates_path = ['_templates'] # 模板路径
The language for content autogenerated by Sphinx. Refer to documentation
for a list of supported languages.
# This is also used if you do content translation via gettext catalogs.
Usually you set "language" from the command line for these cases.
language = 'zh_CN' # 语言
List of patterns, relative to source directory, that match files and
directories to ignore when looking for source files.
This pattern also affects html_static_path and html_extra_path.
exclude_patterns = [] # 忽略的文件
-- Options for HTML output -------------------------------------------------
The theme to use for HTML and HTML Help pages. See the documentation for
a list of builtin themes.
html_theme = 'alabaster' # 主题
Add any paths that contain custom static files (such as style sheets) here,
relative to this directory. They are copied after the builtin static files,
so a file named "default.css" will overwrite the builtin "default.css".
html_static_path = ['_static'] # 静态文件路径index.rst文件
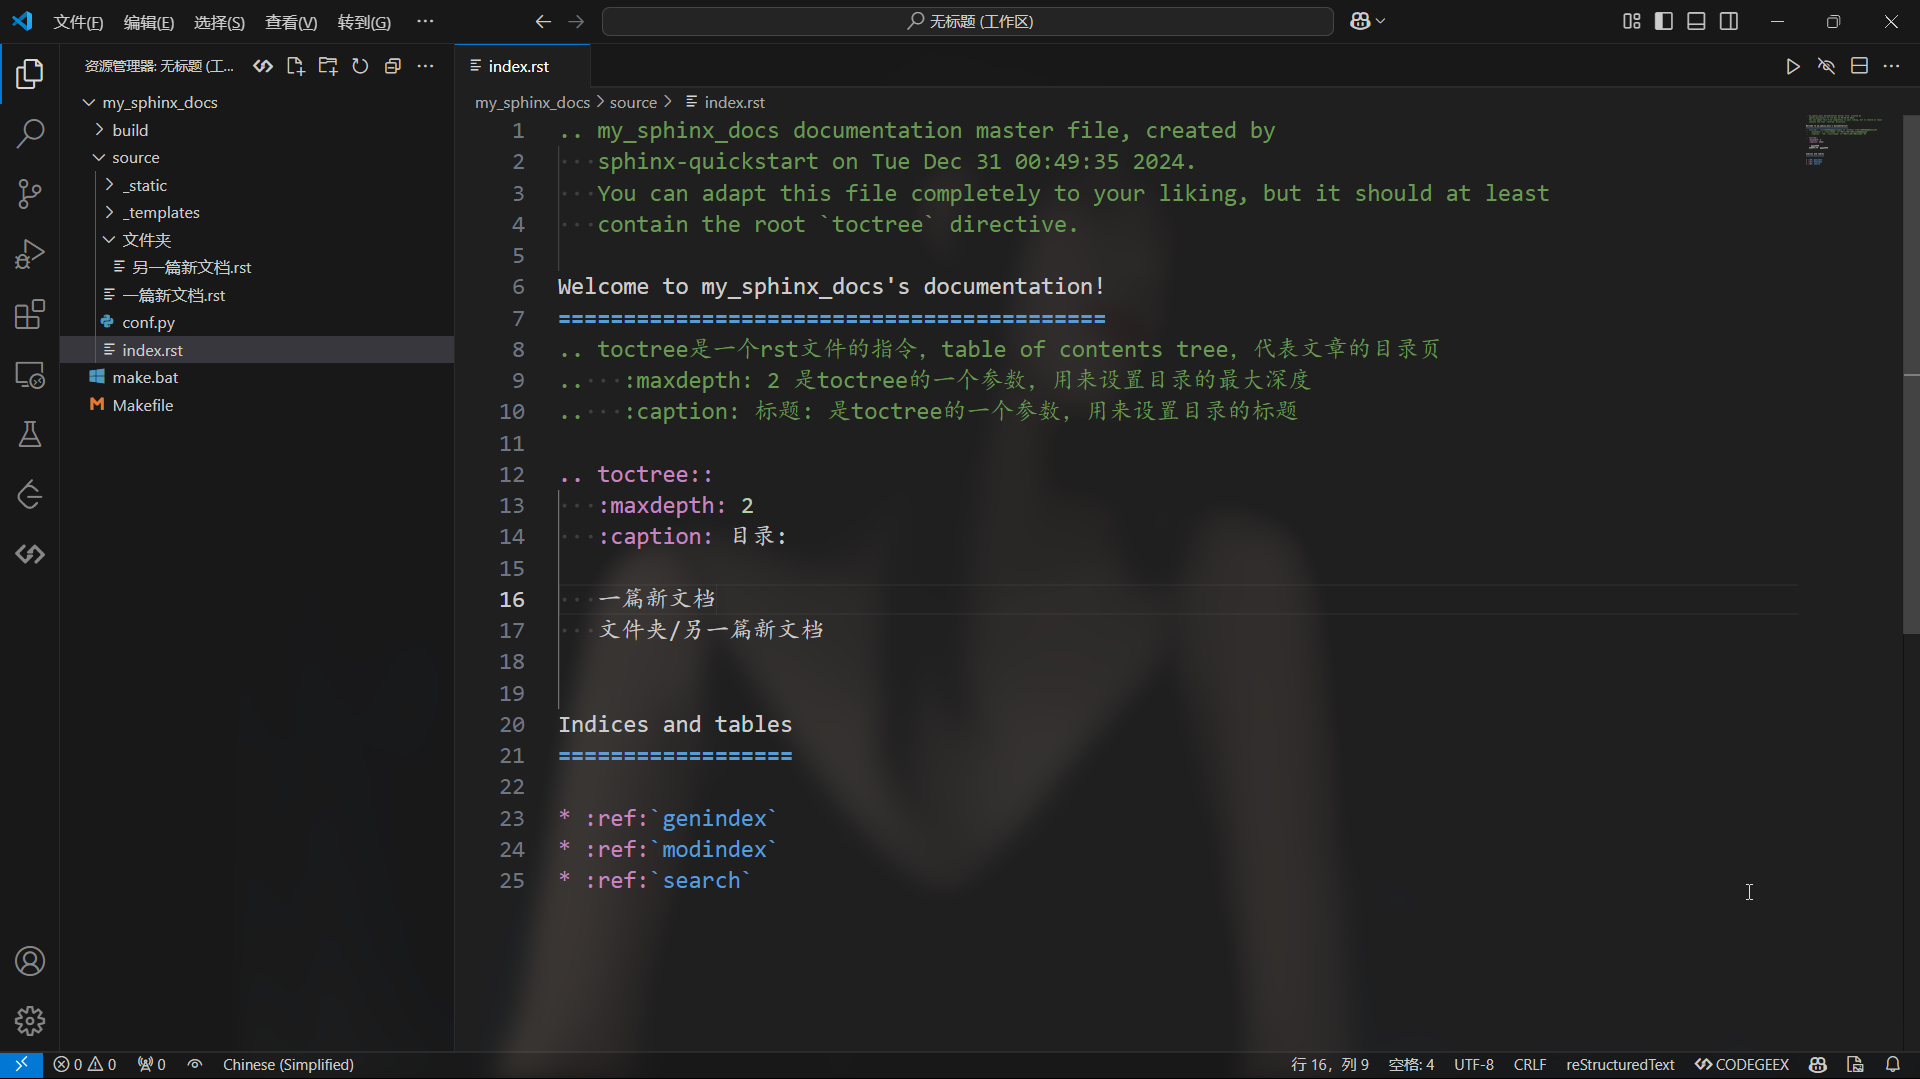
Sphinx自动生成的主页文件,是整个文档的入口。
这个文件需要有一个 toctree 指令来表达该文档的整体结构,例如目前的文件结构如下:
1 | source/ |
只需要将文档名(不需要扩展名)列出在指令中,就会在目录中按照 maxdepth 设置的深度添加这些文档的标题。
1 | .. toctree:: |
有以下注意点:
如果是在 source 中添加了子目录,将文档放在子目录里,填写的路径是相对于 index.rst
:maxdepth: n指的是目录的标题深度设为 n,举例解释:假设
文件一.rst内容为:1
2
3
4
5
6
7
8文件一的一级标题
==========================================
文件一的二级标题
------------------------------------------
文件一的三级标题
~~~~~~~~~~~~~~~~~~~~~~~~~~~~~~~~~~~~~~~~~~maxdepth设置为2的结果是就会是只展示前两级的标题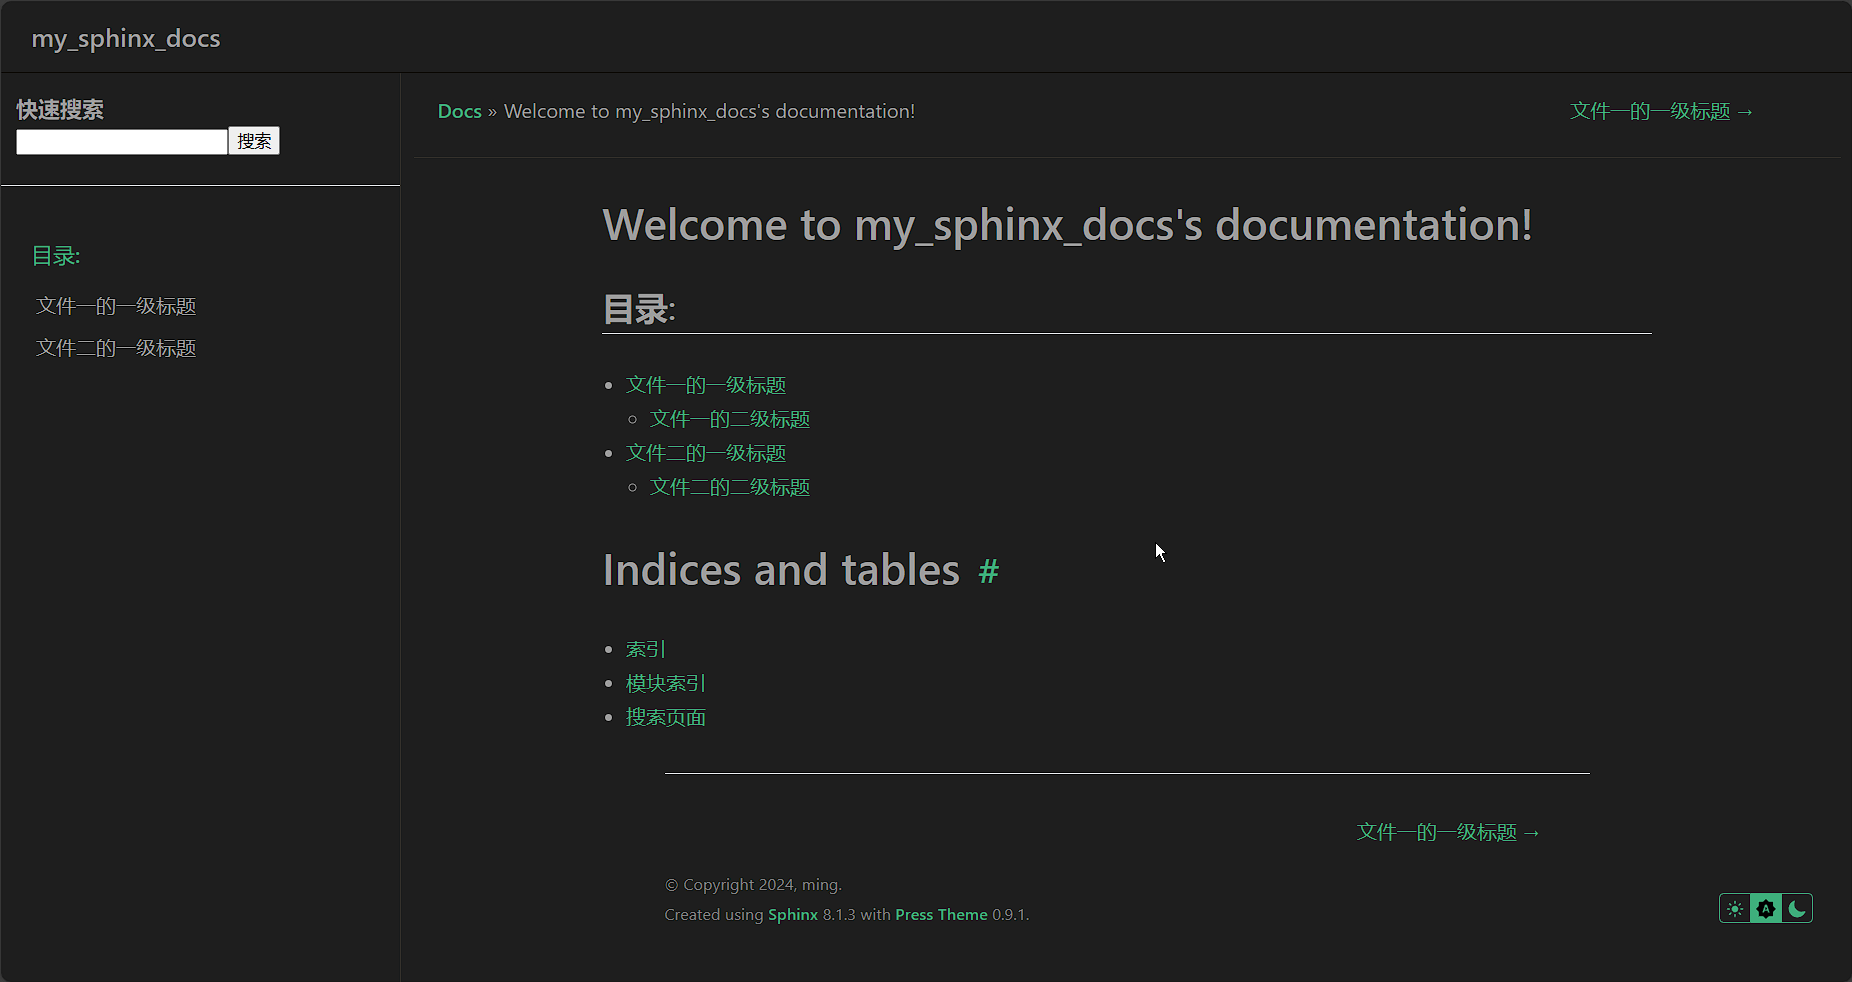
编写文档
reStructuredText是Sphinx默认支持的格式,因此不需要进行额外配置,直接将文档文件放入source目录下,并进行合理的目录结构管理即可。
Markdown格式
- 安装
Markdown扩展
1 | pip install --upgrade myst-parser |
- 添加
myst-parser到Sphinx扩展列表:
1 | 修改 source/conf.py文件 |
- MyST-Parser 要求 Sphinx 2.1 或更高版本。
- 假如我们的
Markdown文件不是以.md结尾,我们需要在conf.py中添加额外设置:
1 | 源文件后缀名配置 |
- 要支持Markdown表格语法,还需要安装sphinx-markdown-tables扩展,并在
conf.py中添加:
1 | pip install sphinx-markdown-tables |
1 | 修改 source/conf.py文件 |
设置主题
- Sphinx支持设置文档的主题,通过
conf.py中的变量html_theme设置。其中Sphinx内建的主题不需要额外安装,例如classic:
1 | html_theme = 'classic' # 主题 |
- 特定的主题(大部分是Sphinx内置)还可以使用
html_theme_options细化配置,例如将侧边栏放在右侧,并为关系栏添加黑色背景(在页面顶部和底部具有导航链接的栏)
1 | html_theme_options = { |
- 内建主题可以在[官方文档主题章节](HTML theming — Sphinx documentation)查看
- 除了内建主题,还有以python包形式分发的,需要使用
pip安装后使用:
1 | pip install sphinx-rtd-theme # Sphinx官网使用的主题 |
1 | 修改配置文件 |
- 可以在这个网站中寻找合适的主题:Sphinx Themes Gallery
- 还有一种是以静态文件的形式提供的
- 对于静态主题, 可以是目录(包含
theme.conf以及其他需要的文件), 或者内容相同的zip文件.必须放在Sphinx可以找到的地方, 在conf.py中, 通过变量html_theme_path设置静态主题的路径. - 例如, 有一个主题
blue.zip, 需要在conf.py中这样配置:
1 | html_theme = 'blue' |
生成文档
在工程目录(非source目录),执行make命令(Windows中使用make.bat)
1 | make html |
就可以生成html静态网页。当然也可以生成dirhtml,singlehtml,epub,devhelp,latex,man,texinfo,text等多种格式。
预览
生成的网页位于build/html目录,浏览器打开index.html即可预览
VSCode使用优化
为了实现在VS Code中实时预览对文档的编辑效果,需要进行以下配置
安装sphinx-autobuild工具
sphinx-autobuild是一个Sphinx提供的工具,启动一个服务监视source/目录,检测到更改时将自动触发构建文档的过程。
可以使用pip进行安装:
1 | pip install sphinx-autobuild |
使用方法:
sphinx-autobuild <源文件目录> <输出文件路径>
1 | sphinx-autobuild ./source/ _build/html |
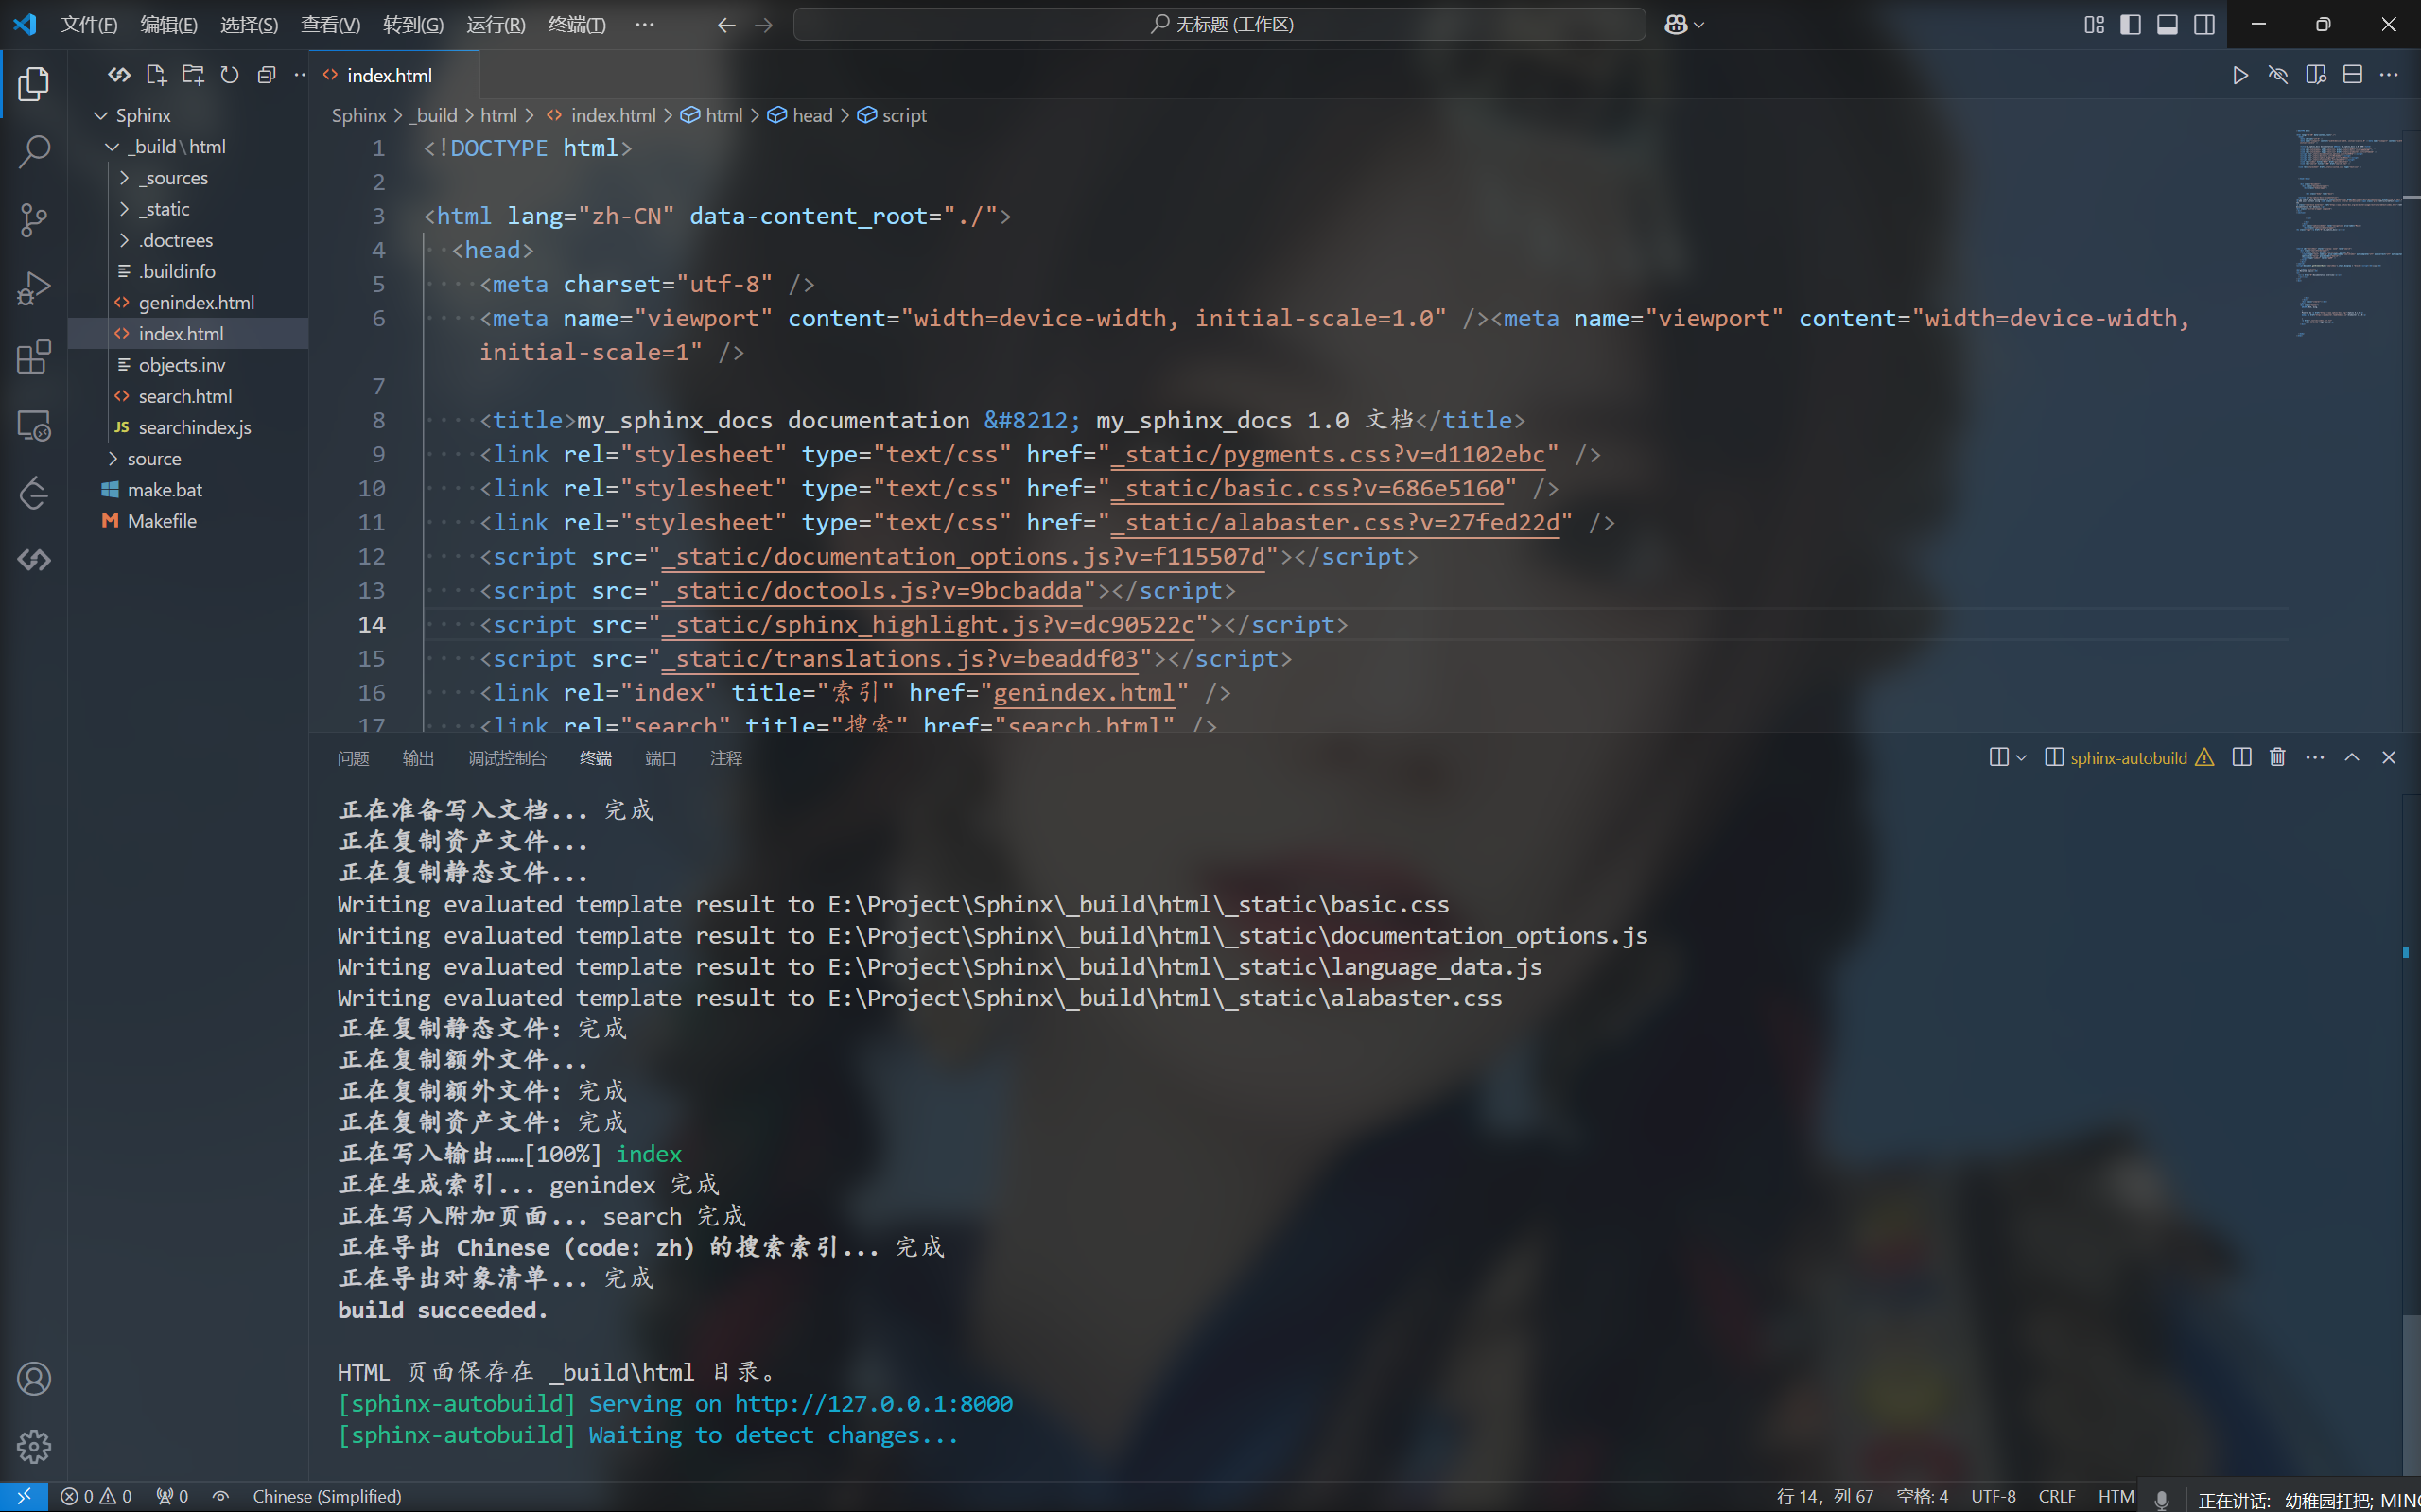
此时浏览器打开http://127.0.0.1:8000已经可以实现实时预览更改。
更详细的用法参考仓库文档:sphinx-autobuild
安装Live Privew插件
Live Preview是一个在VS Code窗口中渲染HTML网页的插件,我们借助它可以将上一步生成的html文件实时渲染在窗口中。
在vscode插件中搜索安装即可。

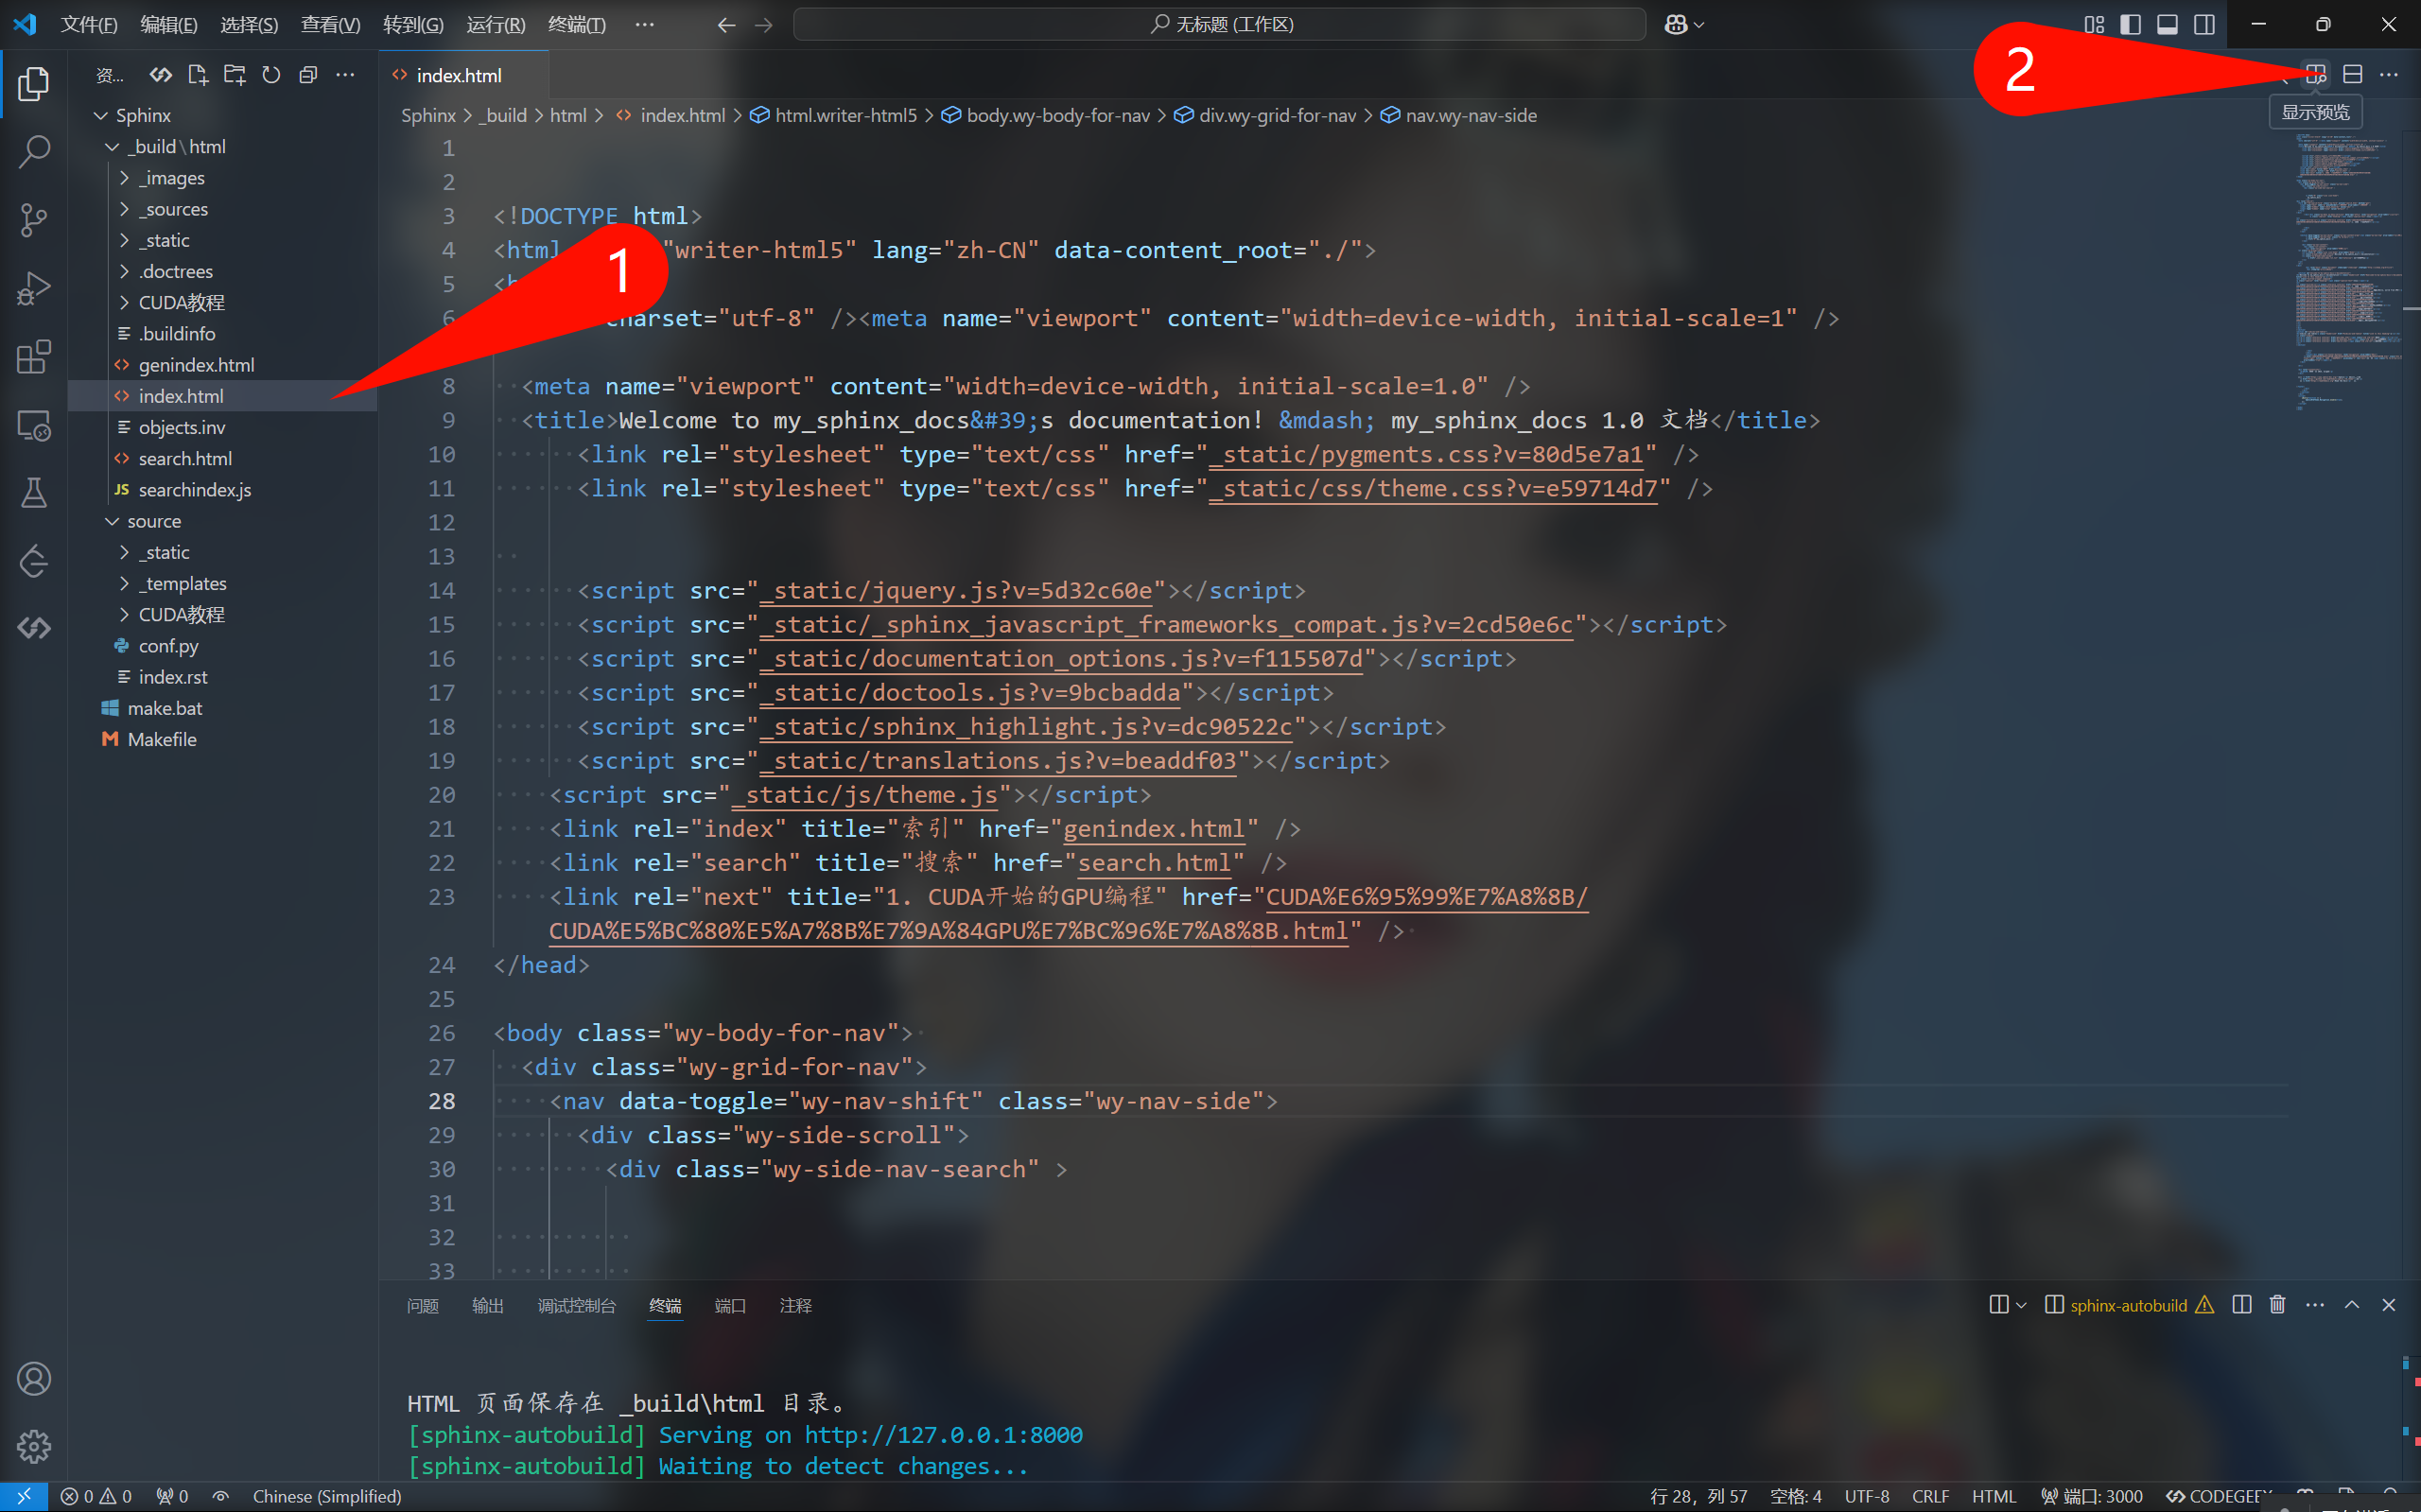
接下来打开sphinx-autobuild工具生成的HTML文档,点击右上角实现预览:
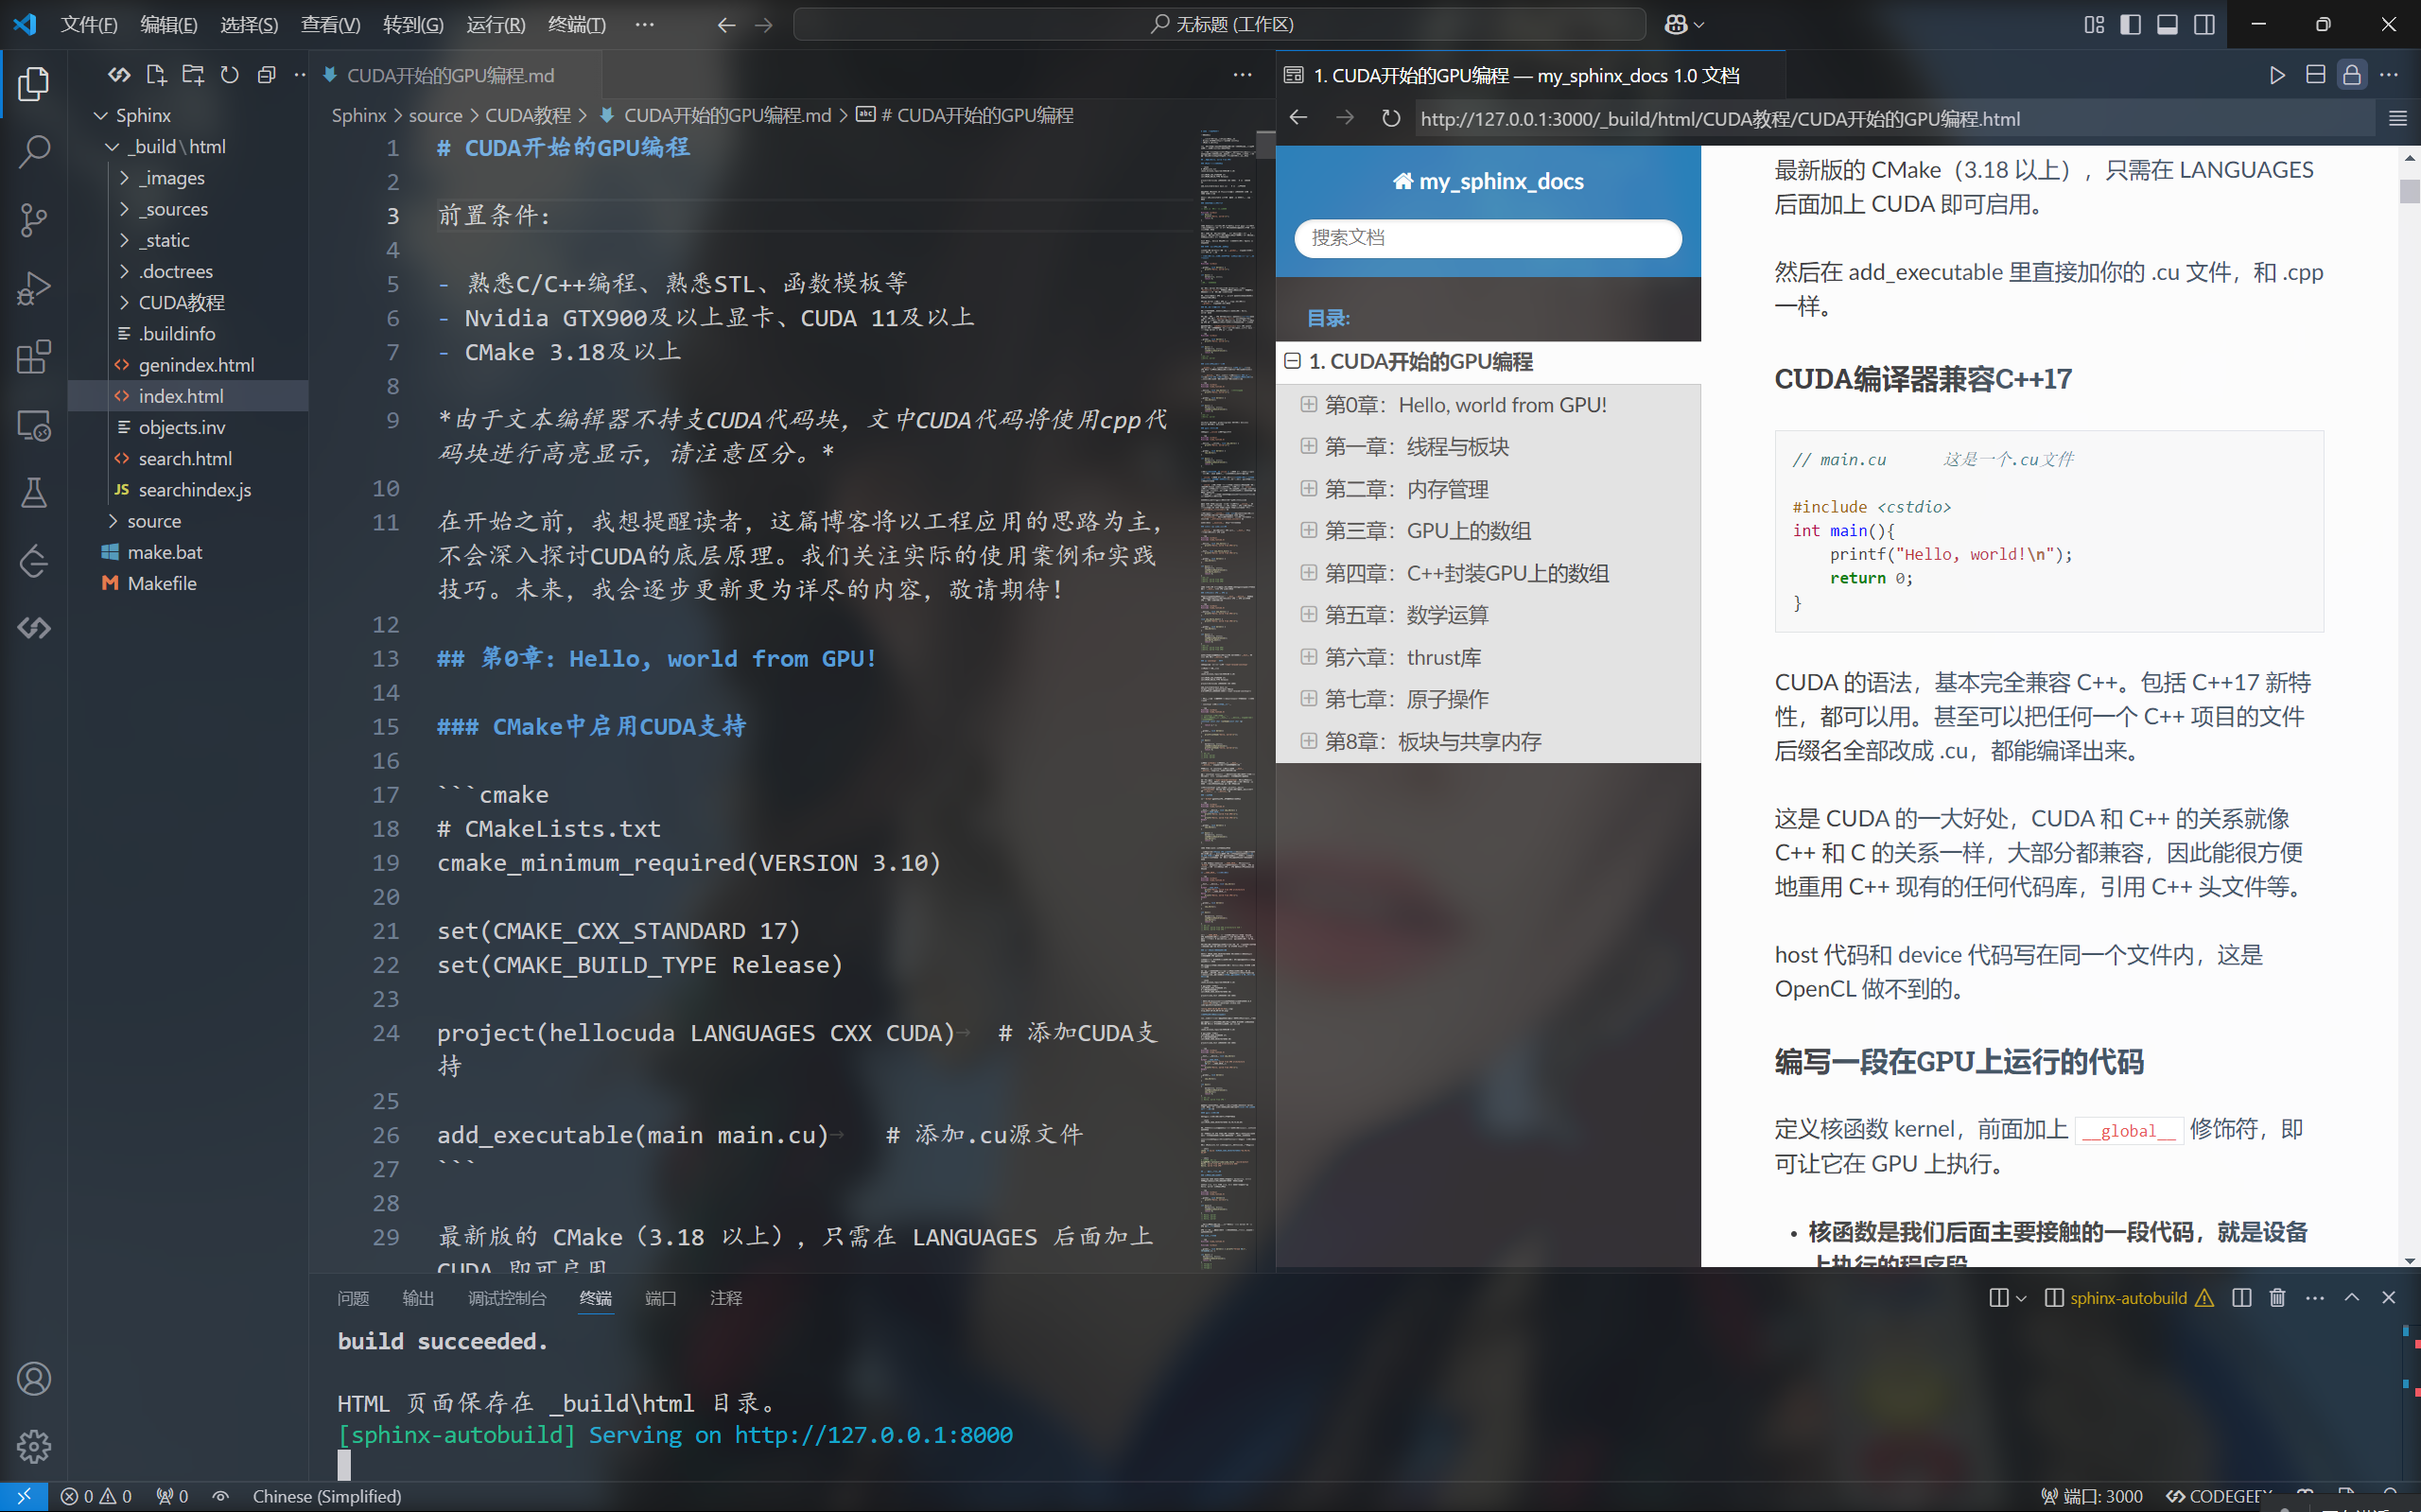
最终实现效果如图:
配置 VSCode 任务来快速启动 sphinx-autobuild
为了进一步简化操作,我们可以创建一个VSCode任务,通过快捷键快速打开。
创建.vscode/tasks.json,内容如下:
1 | { |
之后就可以使用快捷键Ctrl+Shift+B 来启动该任务,或者通过 Ctrl+Shift+P 打开命令面板,选择 Tasks: Run Build Task。
补充说明
- Sphinx需要使用额外的扩展才能支持Markdown格式的文档,这些扩展对非ASCII字符(中文)不友好,目前在Windows环境下测试发现,Markdown文档中不能引用包含中文路径的图片。


